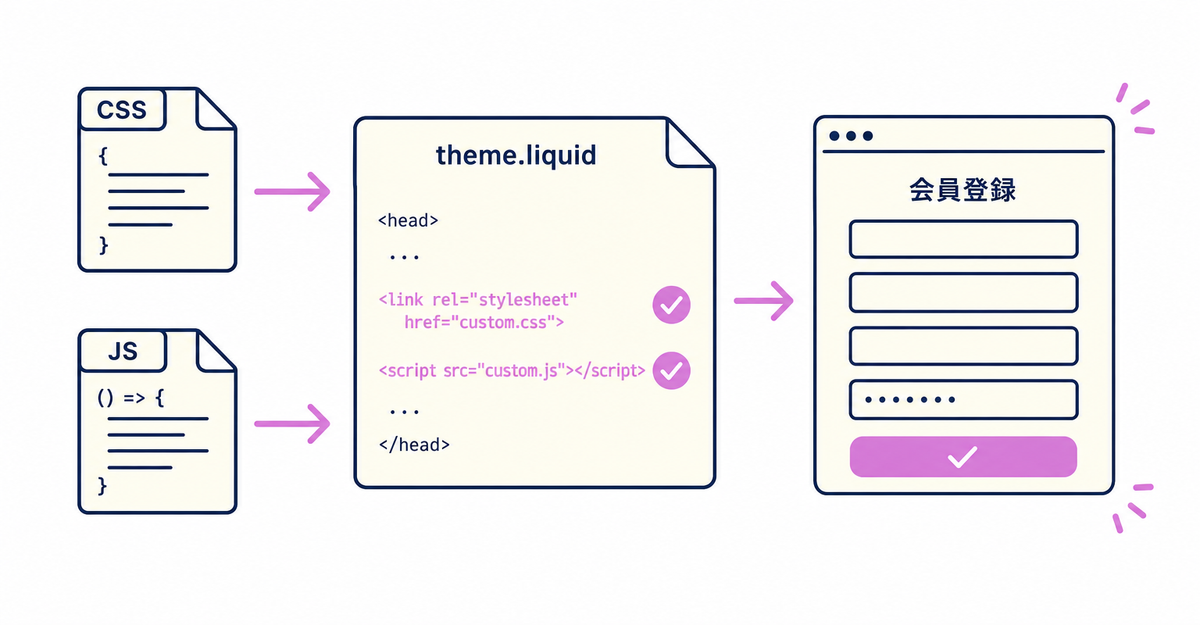
In short: To apply your own CSS and JavaScript to the Howdy sign-up form, set the display timing to Before Login, create custom files in your theme code, and add Liquid conditional code to theme.liquid. You can't use this method when the display timing is After Login.
When you finish the steps in this article, your own CSS and JavaScript load only on the sign-up form page. You can then adjust how the form looks and behaves without affecting other pages in your store. This involves both the display timing setting in the Howdy app and edits to your theme code. The steps for adding the sign-up form itself are in How to add a sign-up form to new customer accounts (Howdy).
Key points
- Custom CSS and JavaScript are available only when the sign-up form's display timing is Before Login
- You create the custom files in your theme code and can give them any name
- The Liquid code you add to theme.liquid uses the condition
request.path contains "howdy-apps" - Because of this condition, the CSS and JavaScript you add load only on Howdy-related pages and don't affect other pages in your store
- You check and change the display timing in General Settings in the app's admin
When can you apply your own CSS and JavaScript?
Only when the sign-up form's display timing is set to Before Login. If the display timing is set to After Login, you can't use this method.
You check and change the display timing in General Settings in the Howdy app's admin. Before you set up custom CSS and JavaScript, first check that the display timing is Before Login. The difference between the two display timing options is explained in How to use a sign-up form alongside Shop, Google, and Facebook login.
Sources: Howdy Help: "How to apply your own CSS and JavaScript" (Japanese) / Howdy Help: "Display timing of the sign-up form" (Japanese)
How is this different from the logo and color settings in the Shopify admin?
In the checkout and accounts editor under Settings > Checkout, you set the logo, colors, and images for the checkout pages, customer account pages, and login page. Howdy's custom CSS and JavaScript go in your theme files and load on the sign-up form page.
To set up the login page, choose the Sign-in page in the editor's page selector. Set the logo in the Logo (「ロゴ」) section under Main (「メイン」), the background color and accent color in the Colors (「色」) section, and the hero image in the Media (「メディア」) section, then save. The hero image appears only on desktop devices. The detailed steps are in How to brand the Shopify login page: logo, colors, and images.
Howdy's custom CSS and JavaScript work when the sign-up form's display timing is Before Login. The files you create in your theme code are loaded through theme.liquid only on Howdy's app pages. To change where customers go after they log in, Shopify Help also describes adding Liquid code to your theme. Everything you can change on the login page is covered in What you can change on the new customer accounts login page: logo, text, and CSS.
Sources: Shopify Help Center: "Customizing customer accounts" / Howdy Help: "How to apply your own CSS and JavaScript" (Japanese)
How do you create the custom files?
Create your own CSS file and JavaScript file in your theme code. You can give the files any name. The example in Howdy Help uses custom-howdy.js and custom-howdy.css.
The file names you create must exactly match the file names in the code you add to theme.liquid in the next step. If you change a file name, update the matching part of the code too. Create the CSS file and the JavaScript file separately, and load each one into theme.liquid with its own code. You edit your theme code in the same code editor you open when you embed the sign-up form in your theme. The embedding steps are in How to add a sign-up form to new customer accounts (Howdy).
Source: Howdy Help: "How to apply your own CSS and JavaScript" (Japanese)
Is there anything to prepare before editing your theme code?
Before you edit theme code directly, we recommend making a copy of your theme. If adding code to theme.liquid or creating files makes the store display unexpectedly, you can go back to the copied theme and check how things looked before.
This preparation isn't only for custom CSS and JavaScript. It applies to all work that embeds the Howdy sign-up form in your theme.
Source: Howdy Help: "How to install the Howdy sign-up app on an unsupported theme" (Japanese)
How do you load the files into your theme?
Add Liquid code to theme.liquid that loads the CSS and JavaScript files you created. To load the JavaScript file, use the following code.
{% if request.path contains "howdy-apps" %}
   <script src="{{ 'custom-howdy.js' | asset_url }}" defer="defer"></script>
{% endif %}
To load the CSS file, use the following code.
{% if request.path contains "howdy-apps" %}
  {{ 'custom-howdy.css' | asset_url | stylesheet_tag }}
{% endif %}
Replace custom-howdy.js and custom-howdy.css in the code with the names of the files you actually created.
Source: Howdy Help: "How to apply your own CSS and JavaScript" (Japanese)
Why do the files apply only to Howdy pages?
Both pieces of code use the condition {% if request.path contains "howdy-apps" %}, which limits loading to Howdy-related pages. With this condition, the CSS and JavaScript load only when the path of the current page contains the string "howdy-apps". The JavaScript code and the CSS code are separate blocks, but both use the same condition.
As a result, the styles and scripts you add apply only to the sign-up form page and don't change how other pages in your store look or work. If you loaded CSS and JavaScript across all of theme.liquid without a condition, they could affect the loading speed and appearance of other pages. This condition avoids that. How this differs from customizing your whole theme is covered in What happens to your theme customizations when you move to new customer accounts?.
Source: Howdy Help: "How to apply your own CSS and JavaScript" (Japanese)
How do you check that the CSS and JavaScript are applied?
After you save theme.liquid, open the sign-up form page and check that the CSS and JavaScript you added are applied. If they aren't, check that the file names in theme.liquid match the names of the files you created in your theme code.
If the file names don't match, the file that the asset_url filter points to doesn't exist, so the CSS and JavaScript don't load. If you change a file name, review the created file and the code in theme.liquid together, for both the CSS file and the JavaScript file.
The CSS and JavaScript you add with the steps in this article don't change how pages other than the sign-up form display. Check the result on the sign-up form page with the display timing set to Before Login.
Source: Howdy Help: "How to apply your own CSS and JavaScript" (Japanese)
The order of the setup steps
In the Howdy Help steps, you first confirm that the sign-up form's display timing is Before Login. Then you create the files in your theme code and load them in theme.liquid. Here are the steps from this article in order.
- Open General Settings in the Howdy app's admin and check that the sign-up form's display timing is Before Login
- If it's set to After Login, change it to Before Login and save
- Make a copy of your theme before you edit its code
- Create your own CSS file and JavaScript file in your theme code (for example, custom-howdy.css and custom-howdy.js)
- Add Liquid code that matches your file names to theme.liquid and save
- Open the sign-up form page and check that the CSS and JavaScript you added are applied
Sources: Howdy Help: "How to apply your own CSS and JavaScript" (Japanese) / Howdy Help: "Display timing of the sign-up form" (Japanese) / Howdy Help: "How to install the Howdy sign-up app on an unsupported theme" (Japanese)
Related articles
- What you can change on the new customer accounts login page: logo, text, and CSS
- How to brand the Shopify login page: logo, colors, and images
Frequently asked questions
Try Howdy free for 14 days
After these steps, your own CSS and JavaScript apply only to the sign-up form page, so you can adjust the design without affecting other pages in your store. Our dedicated team creates customer metafields, sets up sign-up form fields, and places blocks on the profile page for you, free of charge.